TIPS, TRICKS & HOW-TOs
The Bendy Blog: Flexibility Training Articles
Jump to:
Splits & Leg Flexibility / Back & Shoulder Flexibility / Beginner-Friendly / Contortion / All Posts
BY MOST RECENT
All Posts
By popular demand (at least according to Google…) here’s a quick, basic back flexibility routine you can use when you’re crunched for time, or as a base to build a longer training routine off of. Note: this routine focuses primarily on backbending (arching) flexibility, not literally stretching the back muscles (which would involve rounding, not arching, the back).
Being able to reach both hands behind your back and touch or clasp your fingertips is a challenging goal lots of people like to work towards. This type of flexibility can be helpful for yogis who like to work on funky arm binds (it’s the same position used in Gomukhasana or Cow Face Pose, but the flexibility can translate to other arm binds as well), for aerialists and pole dancers who need funk shoulder rotation and behind-the-back reaches to grab their apparatus, and for regular Average Joe folks who want enough shoulder mobility to scratch an itch on their back. Personally, I find having a big range of motion in this pose helpful because it allows my to put sunscreen on my own back without needing anyone else’s help (maybe not a primary motivation for most people, but certainly a plus in my book!).
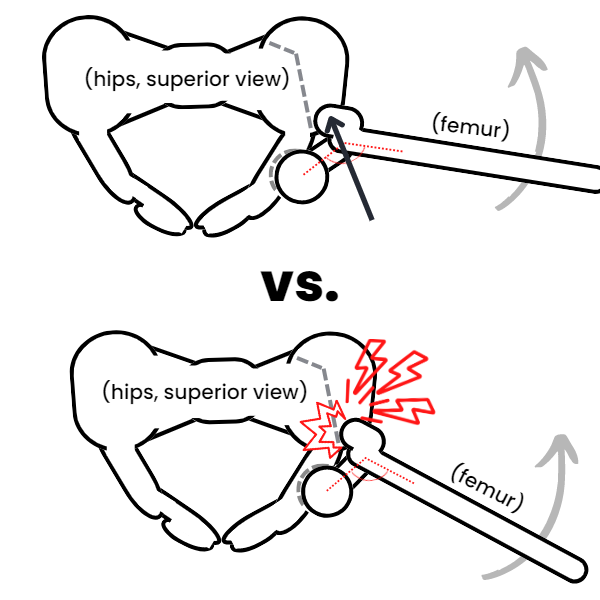
This is a question I frequently get in group classes as well as private lessons - there are some people out there that, based on their hip anatomy, have a hard time feeling inner thigh stretches in things like straddles, middle splits, and frog stretches. Instead, they feel like their legs just get “stuck” when trying to open them out to the side, or may even feel a “pinch” in the front or side of their hip. This can be frustrating because no matter how much you try to stretch, you don’t see any progress in your middles or straddles.
Now what if I told you the solution to this flexibility plateau was NOT trying to push the stretch deeper?
Do you really need to warm up before stretching? Isn’t stretching usually a “warm up” for other workouts?
This really depends on the type of training you plan on working on. The goal of “warming up” is to prepare your body - your muscles, your joints, your cardiovascular and nervous systems, etc. - for your upcoming workout. For some hobbies, like martial arts or pole dancing, that often means including stretches as part of the warm up to be able to use that flexibility in their skill work.
But what about for flexibility training as a “work out?” This is where it really depends on the intensity of the stretching you’ll be doing.
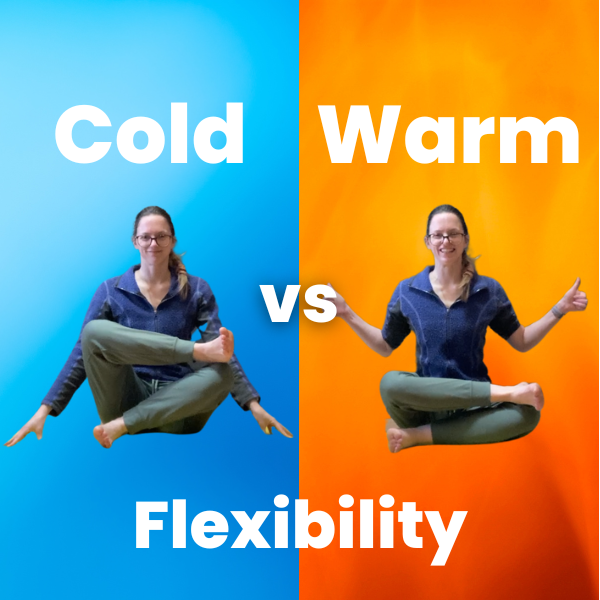
Do you ever feel like you make some good progress during a stretching session, only to have your flexibility revert back to it’s previous less-bendy state the next day? Or maybe you notice you’re able to stretch deeper after a heavy workout like weightlifting than trying to stretch randomly in the middle of the day? Do you have long-term goals to be able to touch your toes or drop into the splits without doing any kind of warm up? All of these are related to the difference between our warm vs. our cold flexibility.
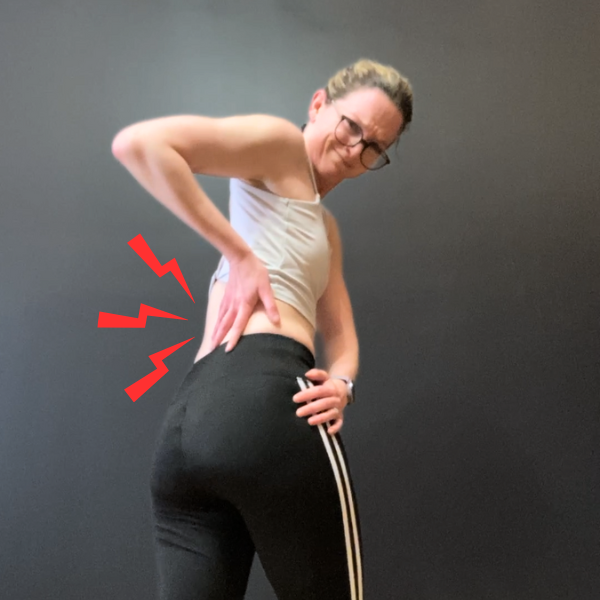
This is a common question I get from students, especially students new to working on back flexibility. It’s not uncommon to get some mild back pain the day after working on backbends, so it’s important to be able to differentiate between “productive” muscle soreness and “red flag” pain indicating improper training technique.
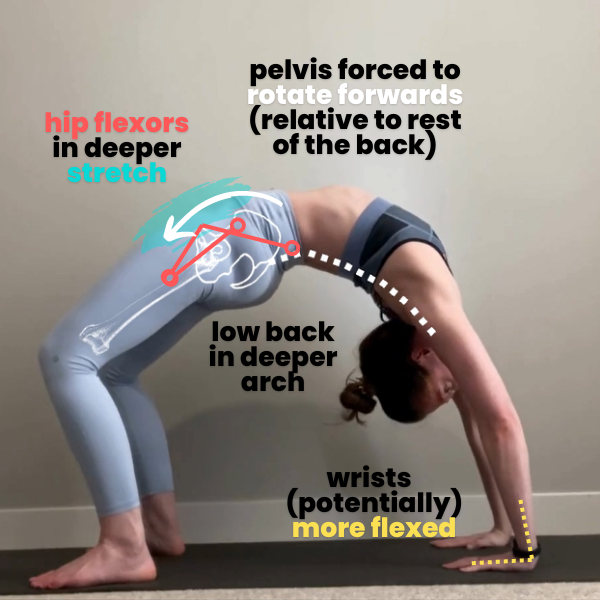
This is a question I sometimes get from students (and even other flexibility instructors) - should we try to keep feet flat on the floor in a bridge, or is lifting the heels OK? The answer - like with so many flexibility questions - is it depends.
Last week I posted about some of my favorite InstagramLast week I posted about some of my favorite Instagram accounts to follow for flexibility education - to keep that same theme going, I also want to share some of my favorite YouTube channels. Like I mentioned in my last post, I’ve never taken an actual anatomy class, so all of my anatomy training has been through taking workshops, and teaching myself with whatever content I can find. Luckily there are some fabulous content creators on YouTube that make this SO easy (and fascinating!) for folks who want to learn more about their anatomy, and how to start applying this knowledge to flexibility training.
‘Tis the season to be thankful - and I’m kicking off this Thanksgiving week (albeit belatedly, since it’s already Tuesday…) with a roundup of some of the Instagram content producers I am most thankful for. We are lucky to live in an age where there are SO many smart instructors, movers, and educators that are passionate about sharing their knowledge of flexibility training with others for free - here is a list of my “Top 5” (and then a whoooooole lot of “honorable mentions”) that are absolutely worth following to help you on your flexy journey.
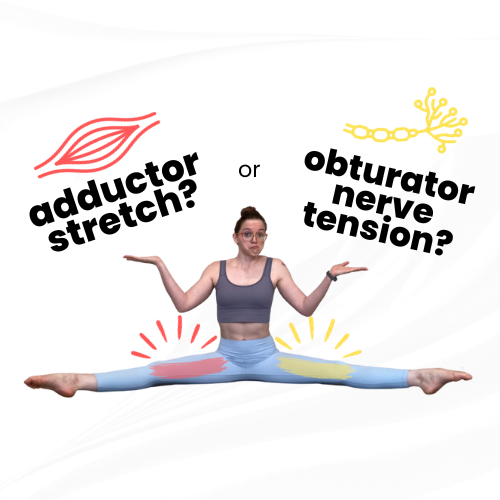
Obturator nerve tension refers to a situation where the obturator nerve, one of the main nerves that goes through our inner thighs, is prevented from sliding like it’s normally supposed to and instead tugged into a position of too-much-tension when we try to stretch our adductors (inner thigh muscles). This can be tricky because it may feel a whole lot like muscle tightness, so it’s important to be able to recognize whether the inner thigh “tightness” or “stretching” sensation you are feeling is actually a muscle stretch (good!) or nerve tension (probably less productive) - so let’s talk about how to figure that out!
Passive stretching has gotten a bad rap y’all.
While there has been a lot of research to support that just passive stretching isn’t a great way to increase your flexibility, and most people make more, faster, progress by including drills that focus on their active flexibility - that doesn’t mean you should stop doing passive stretches!
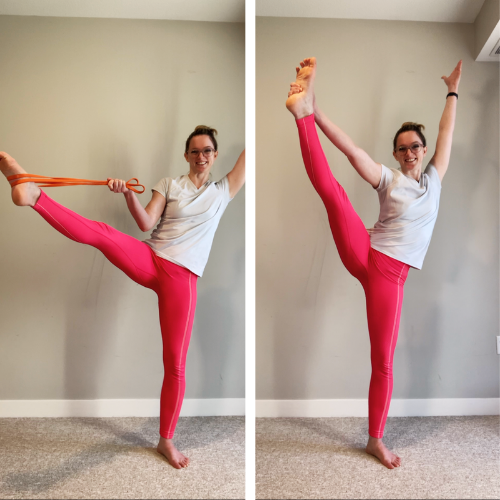
A “Y Scale” or a side leg hold is one of my favorite standing contortion shapes because it’s one of the first ones I ever learned to do. Most students tend to enjoy this shape because it looks cool (obviously!) and is typically easier to train than a “traditional” standing split or the even-more-complex needle scale.
Earlier this week I posted a quick how-to showing the basic mechanics of how to do a Y scale. Today we’ll be looking at how to make it look bendier (working on our flexibility to lift the leg higher, make it look split-ier, etc).
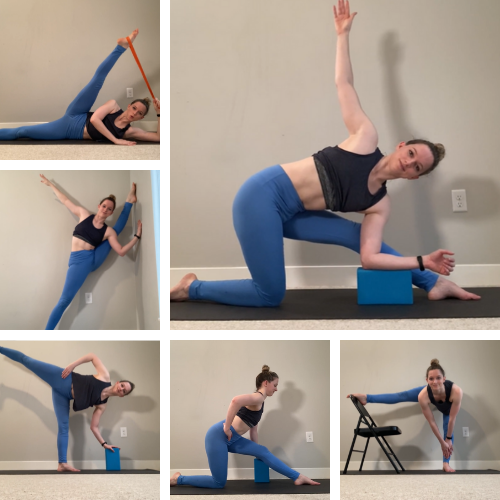
A standing side leg hold, often called a “Y Scale” in the contortion world, is a fun (and impressive!) standing balance that showcases leg flexibility. Unlike a “regular” standing split, a Y Scale is an open split position that allows for both turn-out in the hips, and a tilt of the hips to maximize how high we can lift our leg.
Let’s look at two ways to do this pose: both the traditional standing variation, as well as an easier-to-balance variation lying on the floor.
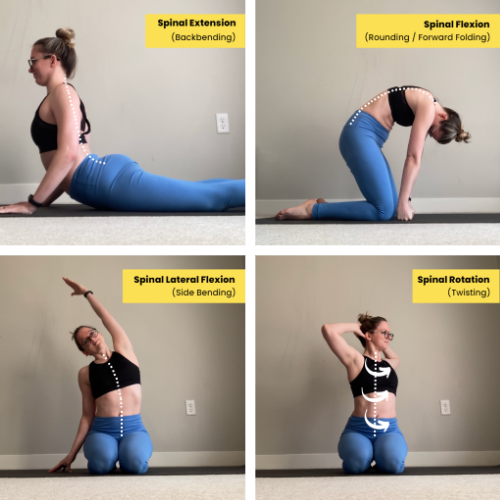
When talking about back flexibility, it’s important to remember that there are many ways our spine helps us move, not just backbending! If we consider all of the different ranges of motion our spine can move in, we have: backbending (spinal extension), rounding forwards (spinal flexion), sidebending (lateral flexion), and twisting (spinal rotation). So let’s look at some stretches that cover each of these areas for full spinal flexibility.
Do you find it pretty easy to open your legs out to the sides in a frog stretch, but when you try to open your legs in a middle split or a straddle, your legs don’t go nearly as far (and it feels waaaaay harder)? They’re both inner thigh stretches, so what gives?
(Spoiler alert: it’s probably your gracilis)
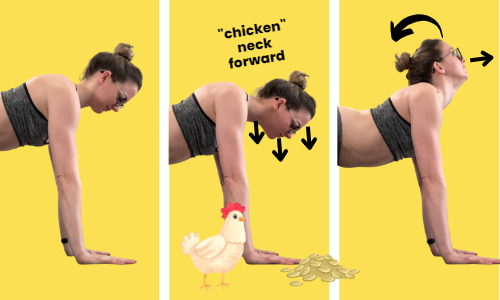
If you’re working for a backbendier cobra, especially if you’re working on your toes-to-head King Cobra, learning how to comfortably add more neck flexibility can be a big help. In this post, we’ll explore a couple of different options for “engaging” the neck to see how they affect the comfort (and depth) of your backbend.
Do you have a hard time keeping your hips “square” when working on your front split? A long looped resistance band can be a great prop to help support keeping your hips square as you slide out into your split. Let’s see two different ways you can use a stretchy band to help keep your hips square.
’ve written before about why we often care so much about keeping our hips “square” (both hip bones pointing forwards, not opening out to the side) in things like front splits and lunges, but that’s easier said than done! Even for students who are totally on board the “I’m Gonna Square My Hips to Get a Better Hip Stretch” Train, it can be challenging to realize are your hips actually square? So today I’ll cover a couple of ways you can train both your visual awareness (can you see if your hips are square?) as well as your physical awareness (can you feel if your hips are square) to be able to identify when your hips are square - and when they’re not and they’re probably avoiding a deeper stretch.
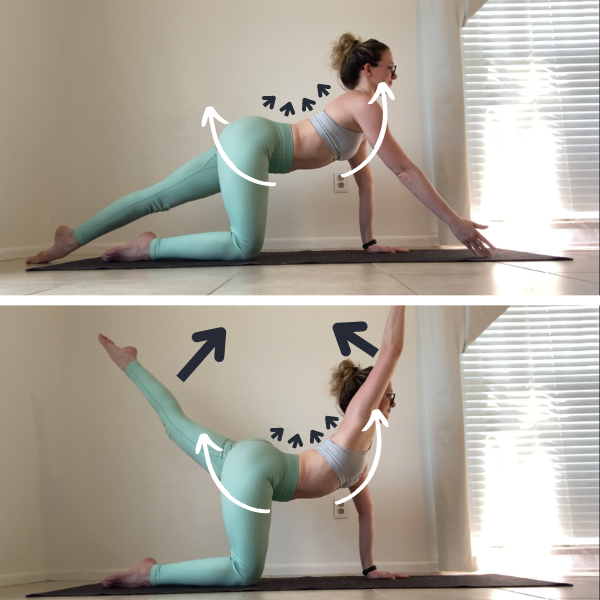
“Bird dog” is a common flow/exercise from yoga that has been adopted by other fitness disciplines because it’s a great (and gentle) exercise for core control. Despite not looking terribly bendy (the goal is generally to keep a neutral spine), this drill can still be quite beneficial for folks looking to deepen their back flexibility. Let’s look at four different variations of Bird Dog that can help us target different areas of the backbending chain, so you can understand how to apply them all to deepen your backbending practice!
Not everyone likes to “take a day off” when it comes to training, whether it’s the mental challenge of feeling like you’re “not doing enough” or you feel like you need to do something every day to build/keep a habit. That’s where shifting your thinking from “do nothing” rest days to “do something” active recovery days can help! Here are some ideas for things you can do on your rest days to help treat your body and ensure it’s getting the blood flow (and rest) it needs to recover from your previous flexy workout.
While we are often tempted to DO ALL THE THINGS when it comes to flexibility training, which may mean enthusiastically stretching every day without fail - this is actually one of the least effective ways to train. Rest days are a critical part of an effective training routine - let’s take a look at why, and how to plan them into your training. You may be pleasantly surprised to see MORE progress only “training” 3-4 days a week instead of every day.
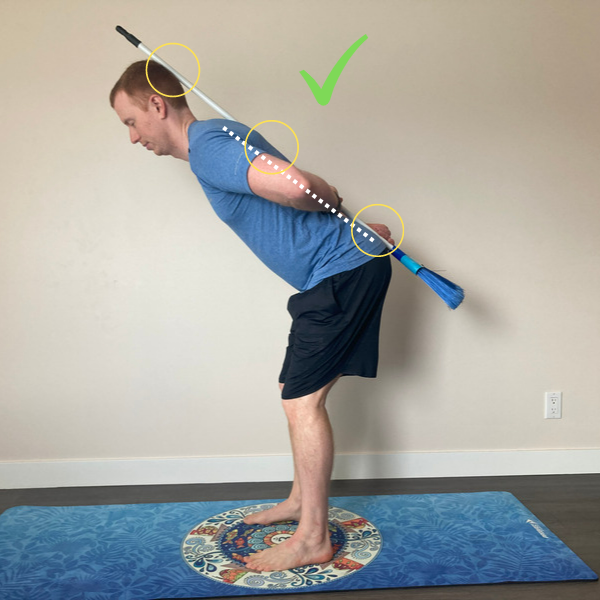
Earlier this week I wrote about why you may choose to keep your back flat (instead of letting it round) in a forward fold - but for many students that’s easier said than done! Like I’ve mentioned in previous posts, our body is really good at avoiding a challenging stretch and compensating by moving other joints (in the case of a forward fold, when the hips are tight that means we tend to try and round the spine to “fold” or reach farther). So for those of you wanting to practice your forward folds with a flat back, here are some of the best modifications and training adjustments I’d suggest.
Do I have to keep my back flat in a forward fold, or is it OK (and safe) to round it? Like with most flexibility-related questions, the answer is “it depends.” So let’s take a look at why you’re doing your forward fold, and discuss different situations where rounding-vs-flattening your back would be a better choice for your particular goals.
Unless you have totally flat middle splits on the floor, I strongly recommend flexing your feet, and keeping the outside edge of your foot lifted. Why? Because that mimics the most “neutral” position of your ankle, so puts the least strain on your ligaments and connective tissue (while in a relatively “heavy” bodyweight-bearing position). Let’s take a look at several foot positions in a not-yet-flat middle split so you can see for yourself…
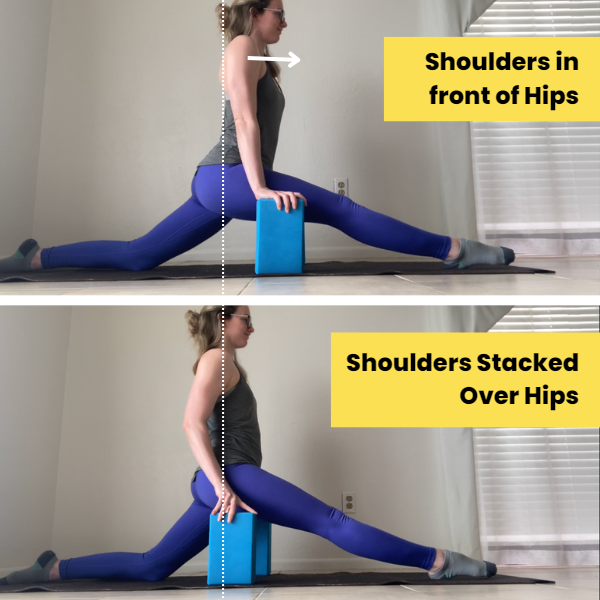
If there’s one correction I have to give just about every leg/hip flexibility class I teach, it’s for some students to lean back a bit more in their front split (or lunge, or pigeon, or any hip flexor stretch for that matter…). Leaning forwards is SUCH a common “cheat” to avoid stretching the hip flexors in the back leg, which for most students, is a critical part of being able to get your splits flat. Let’s take a look at the anatomy of our front split to understand why you probably want to avoid leaning forwards (or in what situations that might be preferred!)
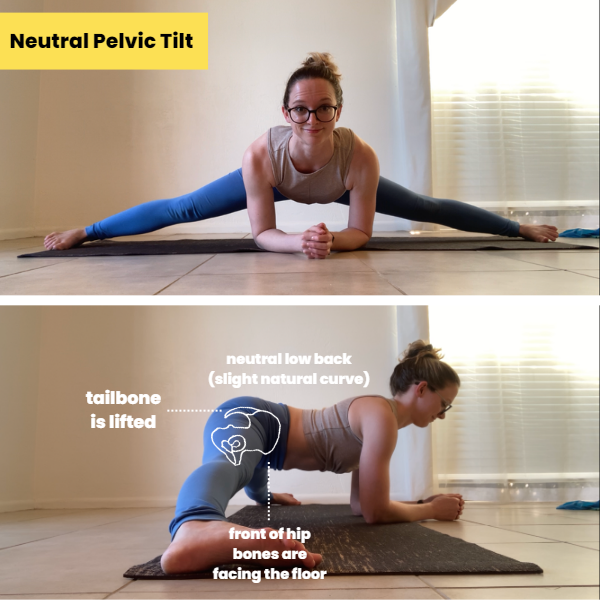
The position and orientation of our pelvis can have a big impact on the effectiveness of the stretch we’re getting in poses like middle splits or frog stretches. A couple of variables we want to consider are: hip-knee alignment, thigh rotation, pelvic tilt, and torso position. A “traditional” middle split calls for neutral hips, hip bones facing the floor, knees and thighs facing forwards, and torso parallel to the floor - but that isn’t the “only” way to do a middle split, nor is it necessarily the “best” way to do it if that doesn’t fit your hip anatomy.
You may have heard that some people have a hip anatomy/structure that makes it impossible for them to ever do flat middle splits. You may have even seen a common test (spoiler alert: this “test” is crap) to show whether or not you have a boney limitation that would make middle splits impossible for you. In this post we’ll explore hip anatomy variations and their implications on our middle splits.
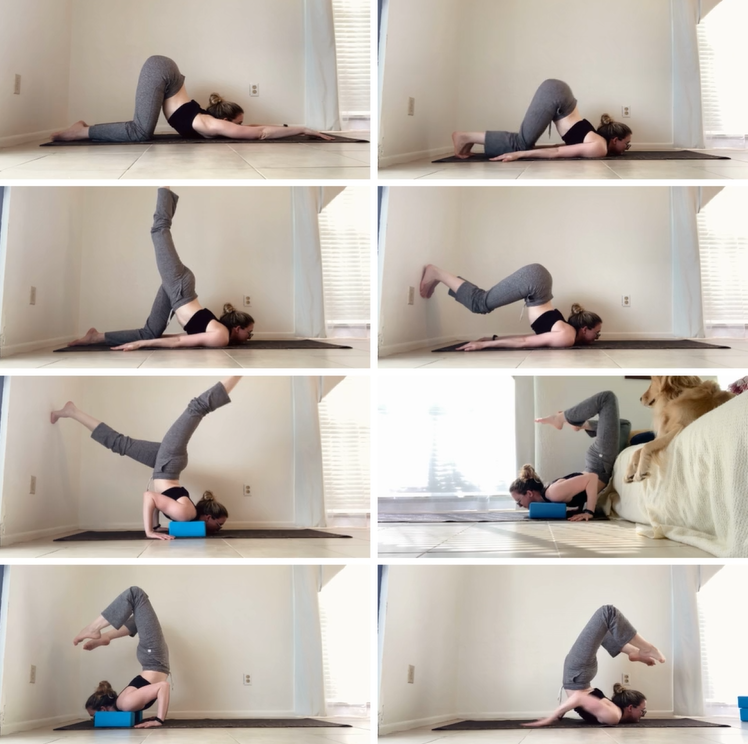
A chest stand is arguably the most iconic contortion pose, requiring extreme levels of back flexibility (from the neck, upper and lower back), as well as incredible core control. It’s no wonder so many students dream to be able to one day do a chest stand! In this post we’ll take a peek into what a skill progression might look like on your journey to this magical trick.
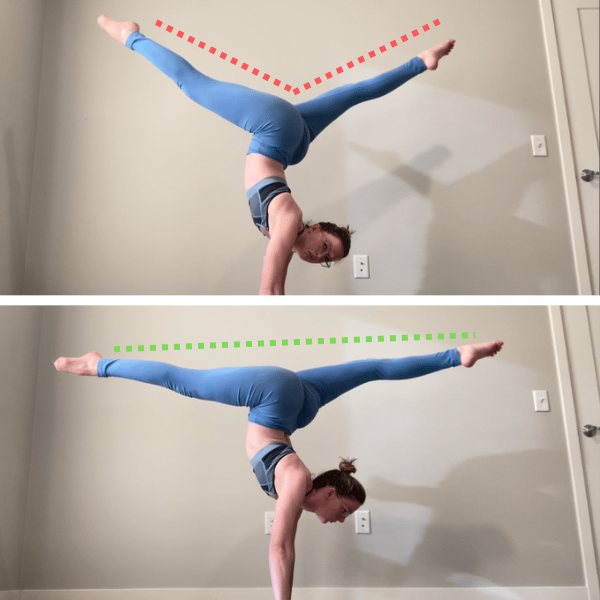
Are you working on flatter, split-ier legs in your inversions? Being able to nail a flat split in a handstand, dangling from the top bar of a lyra, or virtually any instance where your body is upside down is a major active flexibility challenge! Let’s look at some drills that can help train our active flexibility for a flatter split in the air.
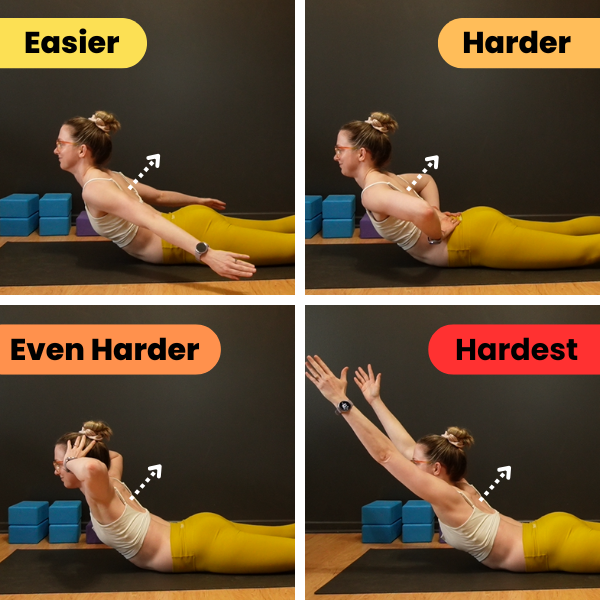

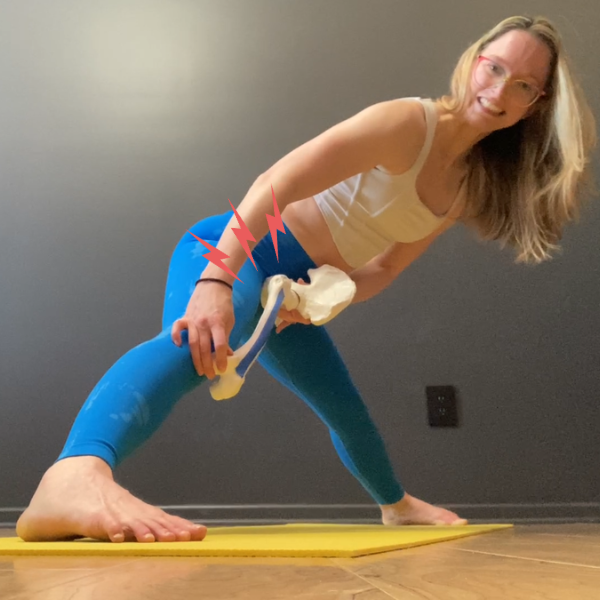








This is a topic I wish I had learned about WAY earlier in my flexibility training journey, because it made such a huge difference in my leg flexibility (and I see the same thing happen with many students that I work with).
For the longest time, I just thought I had tight calves when it came to forward folds . . .